Posts Tagged ‘Longies’

Are You Ready for a Flood?

November 6, 2010

….. that is a FLOOD of information!

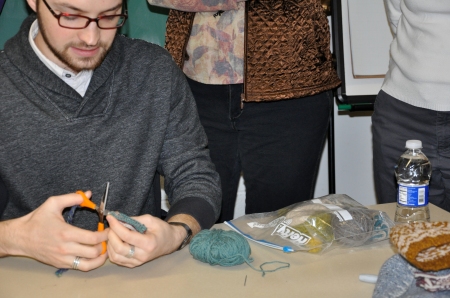
I just spent an entire day taking knitting workshops with Jared Flood.

What a fabulous way to spend an otherwise dreary November day.


In the morning he taught a class on colorwork and convinced students to explore different methods of holding two colors so that we could maintain consistency in dominant and background colors and best of all no more tangled yarns.

We all worked on a speed swatch and had to take an oath that we would try the Crochet reinforced steek that he demonstrated.

I enjoyed a relaxing afternoon knitting along on EZ November Moccasin Sock while Jared worked us through the construction of a seamless sweater from the bottom up. In the past I have made a few sweaters using EZ’s percentages but this workshop was AMAZING! It was full of useful tips, short row shaping, and calculations. I had several AHA moments and have decided that I will rework the shaping on my EZ October Open Collared Pullover just a bit.

On to this months project! For the EZ November Moccasin Socks I chose Mission Falls 136 Merino Superwash for my DH

Now I have to go do my homework for tomorrow’s Koolhaas workshop. Good thing I gain an extra hour tonight!

I selected some of his newly released yarn Shelter in a beautiful Red called Long Johns. Perhaps I should have waited to make the September EZ longies out of this appropriately named yarn.  I will post my progress. No idea how much I will get done in this two hour class.

All of the workshops have been filled for quite sometime but Jared Flood will also be speaking at our regular guild meeting on Monday November 8th.  FMI see the Rochester Knitting Guild website.

Waist Knit, Want Knit

September 23, 2010

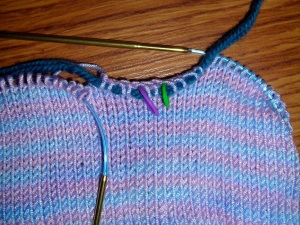
eyelet waistband

The final touches to the leggings was a simple K2 P2 ribbing.

I cheated and went down a needle size or two to make the ribbing a bit more sturdy.

Then I placed eyelet holes just in case she needs an elastic cord or an i-cord. I think the fit is pretty good without it but this is made out of sugar cane and may tend to sag over time.

Finally I casted off loosely following the K2 P2 ribbing and it came out fair. For the next pair I’ll try one of the sewn cast offs described in the Appendix of the EZ’s Knitter’s Almanac.

In total I used just 3 skeins of Araucania Ruca Multi.

Fear not, there were some yarnleftovers that I’ll put to use on a future pair of leggings.

I think I could get away with just two skeins if I made leggings that started at the knee. Young girl who loves leggings wears this shorter style even in the summertime.

Ok so where were we??

September 21, 2010

Hip to waist decreases and back short row shaping details

The Finger Lakes Fiber Festival derailed me over the past few days but the leggings are done!

As promised I would go back and add in a few more details on the finishing. So where did I leave off?

I think I had decided to partially frog the leggings down from the waist to the hip stitches.

  • I then proceeded to mark 2 stitches on either side of the leggings centered on each hip. This is where I decided that the Hip to Waist decreases should be placed for a young girl who is very thin.
Lesson 6: Pay close attention to where you place an increase or decrease line in any garment. There are just some parts of the body that do not need accents, embellishments, or flashing lights saying look at me!
  • I decreased every 3rd row until I reached about 10 stitches less than my original gauge & waist measurements dictated so that the leggings really hug the body.
  • Then I continued to knit round and round without any increases or decreases until just below belly button.
  • Then EZ has you make short rows in back to accommodate the person’s curvy backside. Genius!
  • Please refer to her Knitter’s Almanac for help in determining the placement and number of short rows. I read her instructions over and over again and I just could not get the numbers to work out in my head until I actually just gave up and TRUSTED her. Of course her recommended percentage worked out beautifully.
  • Well… almost. My little model is a little thin in the backside so now that I understood how the shaping was working…
  • You guessed it. I frogged the short rows shaping yet again! I started the short rows quite a few stitches back and then worked a few less rows all together.
  • In other words I cheated!
Tidbit: If you have a garment that already fits  your model well, then there is nothing wrong with cheating. Take measurements, examine the shaping, and make it work!
Lesson7: Short-row shaping. Short rows are quite simple you just wrap and turn. You bring your yarn to the opposite side of your work, slip the next stitch in the same manner as you would work them (slip the Knits knitwise, the purls purlwise), bring your yarn back to the previous working position, slip the now wrapped stitch back onto original needle, then turn your around and continue back across row until reach the next desired wrapped stitch. Continue working back and forth wrapping and turning.
Now that’s the easy part. The more creative step is what to do with each of these wraps when you encounter them as you continue on with your project. This is called concealing your wraps and there are many ways to accomplish the hiding of these little nusances without leaving huge gaping holes.
Now I thought I would be clever and add in a little demo video but I recalled that Cat Bordhi already had a youtube video that describes this process. It is hysterical and if you have never seen it you MUST. You will never look at your stitches the same way again! Perhaps you too will start naming your own stitches. Yes, I bet some of you knitters have not been driven to talk to your knitting. Your time will come.

Cat Bordhi – Part 1: wrapping & turning, concealing wraps

Cat Bordhi – Part 2: wrapping & turning, concealing wraps

TaDaFiniDone

September 20, 2010

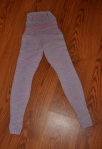
The EZ longies / leggings are DONE!

Over the next few days, I’ll post a few more Lessons learned about this project but this pair is done. Young girl who loves leggings has already picked out some new yarn for her next pair.

Never the Twain Shall Meet

September 14, 2010

No, think positive.

The joining of the two legs IS possible and quite simple.

You must first determine how many crotch stitches you need to reserve. EZ’s Knitter’s Almanac has an easy percentage system that can help you determine the number of stitches. For my little pair I reserved just 10 stitches by locating the two reserved inseam stitches on each leg and then placing these two stitches and 4 more stitches on either side on a yarn leftover.
So for each leg I placed the 10 inseam stitches on a yarn leftover then placed all the remaining live stitches on a circular needle. (Only after running to my LYS to purchase the correct needle size and length. ARRGHHH !!!  I thought I had every size needle imaginable.)
Then I just knit around on all hip stitches.
Lesson 5: Do NOT assume you have every possible sized needle in DPN & all circular lengths. Listen to EZ and make sure you have the necessary double pointed needles and circulars before you start the project.

Is Anyone Out There?

September 12, 2010

Yes, I have heard back from someone who is following along and have started a pair of EZ leggings for their college aged daughter.

Wow how ambitious!

(photo submitted by K. Bell)

Is anyone else making a pair or leggings/longies?

Send me a photo and I’ll post.

If you are on Ravelry you MUST go check out the awesome pair that I only hope to aspire to.

I have made some progress on my comparatively tiny pair. I whipped up the 2nd leg in no time at all.

Now I must go contemplate the joining and shaping of the hip, bottom, and waist.

Labor of Love

September 6, 2010

Today is Labor Day the un-official end of summer.

Young girl who loves leggings loves how the legging are turning out and how soft, smooth, and cool the sugar cane yarn is on her itchy skin.

She wants to know if I’ll have them done so she can wear them on the first day of school! Should I embark on this Labor of Love and try to get them finished in the next few days? Well, we’ll see. She may just have to wait a few more days.

The other day as I was casting on the stitches for the legging cuff, someone asked me, “what on earth are you doing with two needles?” I’m not sure who taught me this tidbit, but this is how I cast on for almost all of my projects that start off with a ribbing.

Tidbit: CO over two needles to insure that your CO edge will not be too tight to allow for the desired stretch of the ribbing.
Tidbit: When knitting in the round. CO 1 extra stitch than you require. Then knit the 1st and last stitches together as you join.
Here’s what I got done today

  • CO 40 sts
  • K2 p2 ribbing for 1inch
  • stockinette for 3inches
  • start back of leg increases
  • follow EZ Knitter’s Almanac instructions for increases.
  • reached the necessary number of stitches for the knee circumference.
  • Try, try, try it on.
  • Knit straight with no increases for 6inches. She has skinny little legs.
  • Tomorrow I’ll start the in-seam increases.

Try, Try, Try Again

September 5, 2010

After traveling across NYS, I had a small start to the legging that was comprised of 1 inch of a K2 P2 border and a few inches of straight stockinette. All ready for a first fitting in the morning.

Upon trying on the sample, the fit was a bit baggy. I had failed to allow for the fact that the knitted fabric would stretch a little and Young girl who loves leggings likes to wear her leggings tight. In the past I’ve tried to knit her socks before out of a variety of fibers including cotton, bamboo, and silk blends but when knit up few of them had little if any stretch. Yeah! Finally I have found a yarn for her sensitive skin that has some give.  Now all my previous calculations should be modified by a few stitches in order to hug to the legs like tights.

So I grabbed the 3 skeins of sugar cane yarn that she had picked out and jumped into the car on our travels to celebrate the last few days of summer.

I modified my CO sts from 44sts down to 40sts and I was soon happily knitting away.

Lesson 2: Allow for your knitted material to stretch.

I knit 1inch of K2 P2 ribbing and then a few inches of stockinette and then thought I should do a double check on fit and gauge measurement. Now with the reduced number of stitches the fit was beautiful. The trying on process was not bad in the car but the gauge measurement was not so easy on ME. Finally after many attempts I was able to get a stitch count. Now with the new yarn and daylight, the gauge checked out the same as before 6.6 sts/inch.

Lesson 3: Do NOT try to determine your gauge on your lap as you are riding along Route 100 in Vermont.

Here’s a sample of the colorway she chose.

Lavender, blue, and pink.

Swatch

September 4, 2010

Now that I have decided who will receive the September longies and selected the yarn, I suppose I should make a swatch to determine my gauge. After all this project is based totally on measurements and gauge.

I’d like to say that I took this swatch construction seriously but truth be told I was desperately stuck in a 4 hour seminar. I was knitting along on a sock in the dark and to my horror I ran out of yarn! I looked at the time and there was still 1 1/2 hours remaining. Panic ensued as I realized I was trapped. I rummaged around in my knitting bag and to my relief I found the sample sugar cane yarn from my stash so I ripped out the needles from the socks and started my sugar swatch.

Lesson1: Lesson learned, always pack extra yarn!

Materials:

Now I am sure EZ would recommend that you use wool and wooden needles but here’s what I selected based on allergies.

  • Yarn: Araucania Ruca Multi
  • Needles: Size 3mm Type: Boye Balene
  • Gauge: measured over 3 inches – 20 stitches
    • therefore,  6.6 sts/inch (I am not afraid of decimals but feel free to adjust your needle size if you want nice even numbers to work with.)

You have to feel this yarn made from sugar cane it feels smooth as silk and I swear mine smelled like cotton candy. I’m really glad that I chose to use the Boye Balene needles for they have a blunt tip which helps since this yarn tended to split a bit when I first started using it.

Recipe: Measurements for slim 7 year old girl

I decided to do a K2 P2 ribbing for the ankle cuff so I CO a multiple of 4 sts – close to my 42.9 sts = 44 sts.

Now I am ready for a long car ride to go pick up Young girl who loves leggings. In a few hours I should have enough knitted up so that I can do a fitting and double check my gauge as knit in the round.

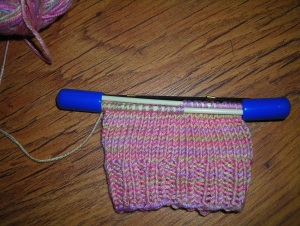
Initial Legging Swatch

<- note I love my StitchKeepers by Rollie

Ready, Set, Cast-On

September 3, 2010

Well…. not exactly.
The September project is a pair of nether garments, longies, long johns, tights, or in my household they are called leggings.
A few days ago I committed myself to a year of working through the projects in EZ’s Knitter’s Almanac. Now I have to decide exactly who I am going to make the longies for.

Candidates:

1. Me, myself, & I. I’d love a pair for myself BUT:

  • A: Who am I kidding? I would never finish them in a month!
  • B: Do I really want to share my measurements with the world?

2: Baby. EZ suggests making a small pair 1st, like a pair of baby leggings.

  • Problem- this project is all based on measurements and although I know of a few pending deliveries, well, they have not exactly arrived yet.  So I do not have a spare baby to measure.

3. Young girl who loves leggings (and fortune cookies). Perfect this should be a reasonable sized project. After all they are not much more than a really long pair of socks. Right?

  • Problem #1- I sent her away to Grama Camp yesterday! (and I want to start NOW)
  • Problem #2- Young girl is extremely allergic to all animal fibers, soy, and acrylic. ARRGGHHH!

Sounds like Young girl who loves leggings is the winner. We’ll work through the obstacles.

  • Solution #1- Grama is a knitter and can make a few basic measurements to get me started.
  • Solution #2- Part of Grama Camp is a field trip to the Eric Carle Museum AND that just happens to be very close by to small yarn shop.

They managed to pick out some yarn made of Sugar Cane (Araucania Ruca Multi) which is ideal for this candy loving girl. I even have some in my stash so I can at least cast-on and start to determine my gauge. Here’s what I had in my stash. I can’t wait to see what colorway she has picked out.